Vendors are the companies from which your company purchases goods and/or services. Once you create a vendor record with at least one vendor location and one vendor contact, you can start recording invoices and payments for the vendor.
Create a vendor
- In the Navigation pane, highlight the Accounts Payable > Vendors folder.
- Click
 . The New Vendor window opens.
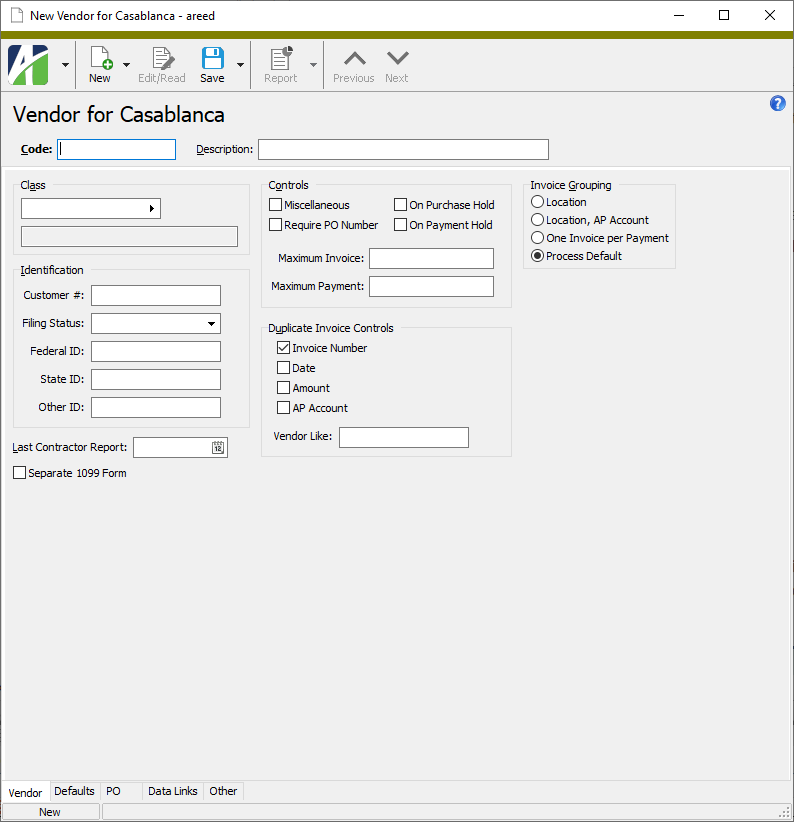
- In the Code field, enter a unique vendor code. You can use up to 30 characters.
- Enter a Description of the vendor. You can use up to 50 characters.
- In the Class field, select the vendor class the vendor belongs to.
- In the Customer # field, enter the customer number the vendor has assigned to your company.
- From the Filing Status drop-down list, select the filing status reported on the vendor's W-9. Your options are:
- Individual
- C Corporation
- S Corporation
- Partnership
- Trust/Estate
- LLC C Corporation
- LLC S Corporation
- LLC Partnership
- Other
-
In the Federal ID field, enter the vendor's Employer ID Number (EIN) or Social Security Number (SSN). Include dashes in the federal ID. ActivityHD warns you if another vendor is found in the system with the same federal ID. You can override the warning if you need to enter multiple vendors with the same federal ID.
Note
The Federal ID field is controlled by security settings. If you do not have "Federal ID" access to the Vendors resource, the field contents are always obscured and the field is read-only. If you do have "Federal ID" access, the field contents are obscured except when the field has focus. If you prefer for the field contents to always be unobscured, select
 > View > Federal ID > Show Unobscured.
 - In the State ID field, enter the vendor's state ID. Include any formatting characters. ActivityHD warns you if another vendor is found in the system with the same state ID. You can override the warning if you need to enter multiple vendors with the same state ID.
- In the Other ID field, enter any other ID for the vendor. Include any formatting characters. This is typically the local tax ID. ActivityHD warns you if another vendor in the system has the same "other ID". You can override the warning if you need to enter multiple vendors with the same "other ID".
- In the Controls section, mark the checkboxes which apply to the vendor.
- Miscellaneous. Mark this checkbox if the vendor is a miscellaneous (single-use) vendor. Miscellaneous vendors can be excluded from reports and from the Find dialog box.
- Require PO Number. Mark this checkbox to require that all invoices for the vendor have a PO number.
- On Purchase Hold. Mark this checkbox to place a hold on making purchases from the vendor. You can still input invoices for a vendor on hold; however, ActivityHD will warn you of the purchase hold status.
- On Payment Hold. Mark this checkbox to hold payments to the vendor. A vendor on payment hold cannot be paid using the group pay option, but can be paid individually. Payments can be input on an invoice for a vendor on hold; however, ActivityHD will warn you of the payment hold status.
- In the Maximum Invoice field, type the maximum dollar amount allowed on an invoice from the vendor. Invoices for larger amounts cannot be entered for the vendor. Negative values are permitted.
- In the Maximum Payment field, type the maximum amount of each payment to the vendor. Payments for larger amounts cannot be entered for the vendor. Negative values are permitted.
-
In the Duplicate Invoice Controls section, mark the checkbox for each item you want ActivityHD to include in duplicate checking when merging invoices. ActivityHD includes merged and unmerged invoices in duplicate checking. If you mark multiple invoice controls for checking, ActivityHD checks to see that all the selected controls are duplicated; no error is generated for partial duplication.
Note
If you use ActivityHD Purchasing, duplicate invoice checking is also performed during purchase order processing.
Your options include:
-
Invoice Number. ActivityHD checks for duplicate invoice numbers.
Note
If an invoice number is all digits, it is compared to other invoice numbers as a number. Leading zeros are ignored when comparing for duplicate invoice numbers. As a result, invoice #001234 would be considered a duplicate of invoice #1234.
- Date. ActivityHD checks for duplicate invoice dates.
- Amount. ActivityHD checks for duplicate invoice amounts.
- AP Account. ActivityHD checks for duplicate AP accounts.
- Vendor Like. Enter a vendor mask if you want ActivityHD to check vendors that match the mask when it checks for duplicates.
-
- In the Invoice Grouping field, select how to group the vendor's invoices in the Pay Invoices process. Your options are:
- Location. Group the vendor's invoices by payment location and produce one payment per payment location.
- Location, AP Account. Group the vendor's invoices by payment location and by AP account. Produce one payment for each different payment location/AP account combination.
- One Invoice per Payment. Produce a separate check for each invoice.
- Process Default. If you select this option, the grouping selected in Pay Invoices will be used for this vendor.
-
If your site has multiple ActivityHD companies which share the same payer TIN but need to report 1099 amounts as separate business entities, mark the Separate 1099 Form checkbox to ensure correct 1099 reporting.
By default, the checkbox is unmarked. The default behavior is to combine payments for multiple vendors which share the same tax ID.
When the checkbox is marked, the following behaviors result:
- The Generate 1099s process produces a separate 1099 for the vendor even if there are other vendors with the same tax ID.
- The minimum reporting threshold is applied on payments to the vendor and not to the combined payments for all vendors with the same tax ID.
- The vendor code appears in the "Account number" box on printed 1099s and in the "Payer Account for Payee" field in the electronic reporting file.
- If corrections are required, corrections are performed for vendor-specific 1099s, not for combined vendors with the same tax ID.
- All vendors which share the same tax ID are required to have the same Separate 1099 Form setting.
- Select the Defaults tab. Defaults help you improve data entry efficiency and reduce mistakes on invoices and payments.
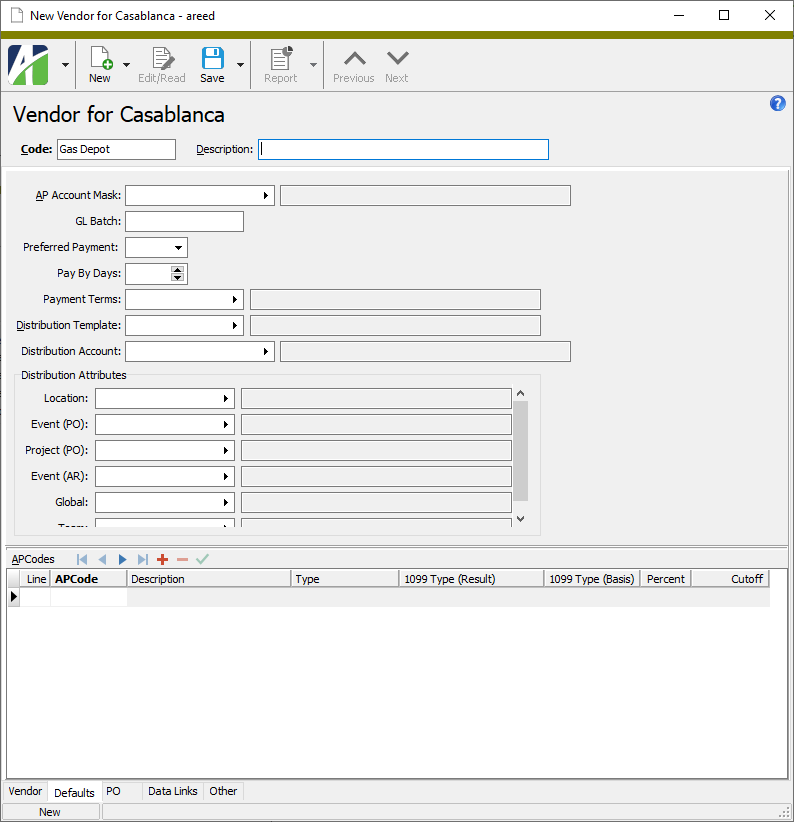
- In the AP Account Mask field, enter a full or partial AP account mask to assign as the default liability account on new invoices for the vendor.
- In the GL Batch field, enter the default GL batch name to use for invoices and payments for the vendor.
- From the Preferred Payment drop-down list, select the default payment method for the vendor. Your options are:
- Check
- EFT
- Manual
- In the Pay By Days field, enter the number of days to subtract from invoice due dates in order to determine the default "Pay By" date for the vendor's invoices.
- In the Payment Terms field, select the default code for the terms to apply on the vendor's invoices. Payment terms allow automatic calculation of discounts and due dates on invoices.
- In the Distribution Template field, select the default distribution template to apply on the vendor's invoices.
-
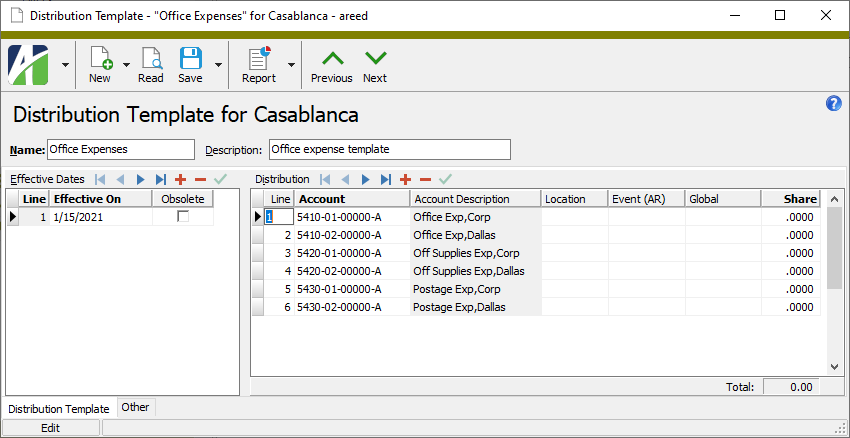
If you want multiple distribution accounts to default on the vendor's invoices, assign a default template and then enter the distribution account mask in the Distribution Account field.
Example
The distribution account mask in the image below has the main segment partially masked.
This allows you to specify the main segment on the vendor's default distribution account mask. The segment is then combined with the template's other segments to create a multi-line distribution when the Distribution wizard is used while posting invoices.
- In the Distribution Attributes section, for each attribute needed, select the default attribute item to apply on invoices this vendor is assigned to.
- In the APCodes table, enter the APCodes to automatically apply to the vendor's invoices. A given APCode can only appear in the table once. To add an APCode to the table, do the following for each APCode you need to enter:
- In the APCode column, select the APCode to apply.
- If the APCode type is "Payment Withholding" or "Use Tax" and you need to override the withholding rate or tax rate from the APCode, type the rate in the Percent column; otherwise, leave the Percent field blank.
- If the APCode type is "Payment Withholding" and you need to cap the withholding amount for the APCode for all time, enter the withholding limit for the APCode in the Cutoff column.
Note
If the vendor is subject to 1099 reporting, an APCode for federal reporting must be assigned in the APCodes table.
- If the ActivityHD Purchasing package is installed, a PO tab is visible. Select it. Otherwise, skip to step 32.
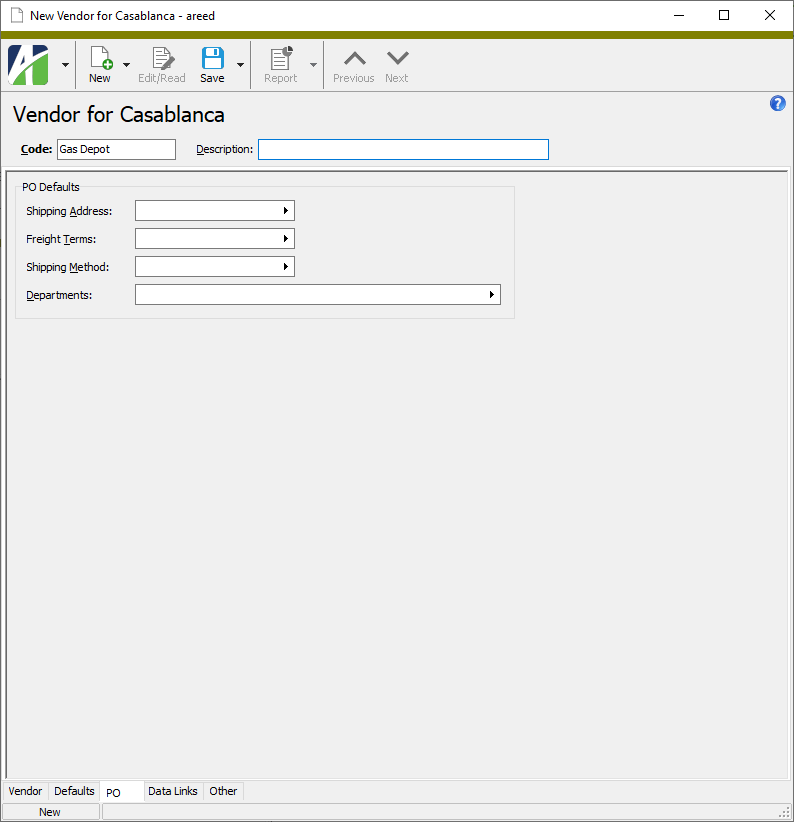
- In the Shipping Address field, select the code for the default shipping address to use on POs for the vendor. This is particularly useful if purchases from the vendor are typically shipped to a single address.
- In the Freight Terms field, select the code for the default freight terms to apply on POs for the vendor.
- In the Shipping Method field, select the code for the default shipping method to use on POs for the vendor.
-
In the Departments field, select the department(s) for which this vendor is an approved supplier. This field works in conjunction with the Restrict Vendors flag on departments in Purchasing. When a purchase is entered for a restricted department, only the vendors assigned to that department are eligible to be used. This helps you ensure that a department conducts business with only those vendors they are authorized to conduct business with.
If you enter multiple departments, separate them with commas. If you use the Find dialog box to select departments, you can use Ctrl and/or Shift selection to select multiple departments.
- Save the new vendor record.
After you create the vendor record, you can add vendor locations for the vendor. Once vendor locations are added, you can add vendor contacts. Once the vendor record, vendor locations, and vendor contacts are set up, you can start entering invoices for the vendor.
A vendor record cannot be deleted if it has invoices or payments.
When a vendor is deleted, its locations, contacts, and notes are deleted automatically.
To delete a vendor, highlight the vendor record in the HD view and click ![]() , or open the vendor record and select
, or open the vendor record and select ![]() > Edit > Delete. In either case, ActivityHD prompts you to confirm your action. Click Delete to delete the vendor.
> Edit > Delete. In either case, ActivityHD prompts you to confirm your action. Click Delete to delete the vendor.
When vendors are combined, the default APCodes from the source vendor are NOT copied to the target vendor. Locations from the source vendor are copied to the target vendor; however, the default location flags are cleared before copying so that there are no conflicts with the target vendor's default location flags.
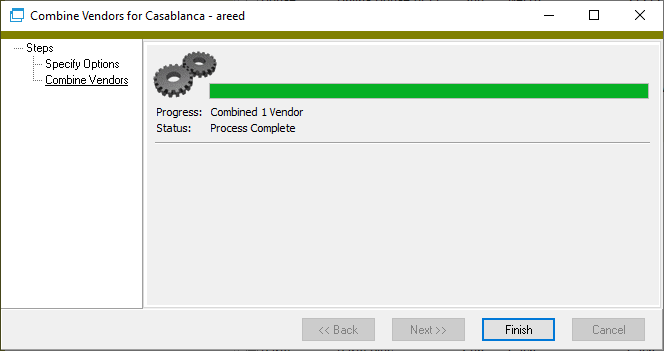
To combine vendors:
Combine vendors
- In the Navigation pane, highlight the Vendors folder.
- Start the Combine Vendors wizard by one of the following methods:
- To use filters to select the source vendor(s) to combine:
- Right-click the Vendors folder and select Select and Combine from the shortcut menu.
- On the Selection tab, define any filters to apply to the data.
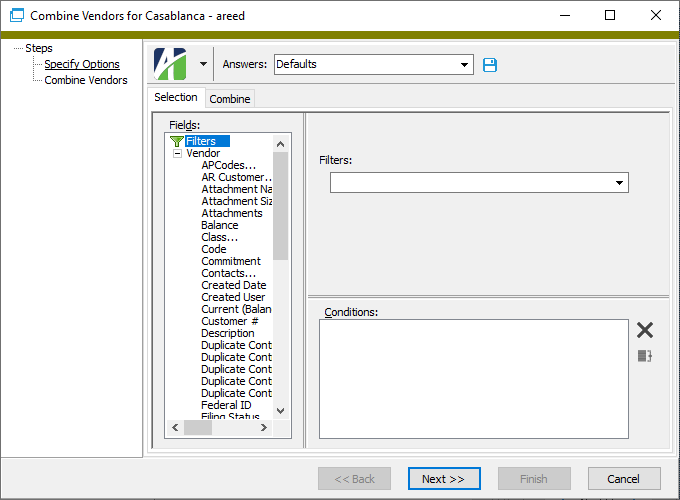
- To hand-select the source vendor(s) to combine:
- In the HD view, select the vendor(s) to combine. You can use Ctrl and/or Shift selection to select multiple vendors.
- Click
 .
.
- To use filters to select the source vendor(s) to combine:
- On the Combine tab in the Combine Into field, select the target vendor.
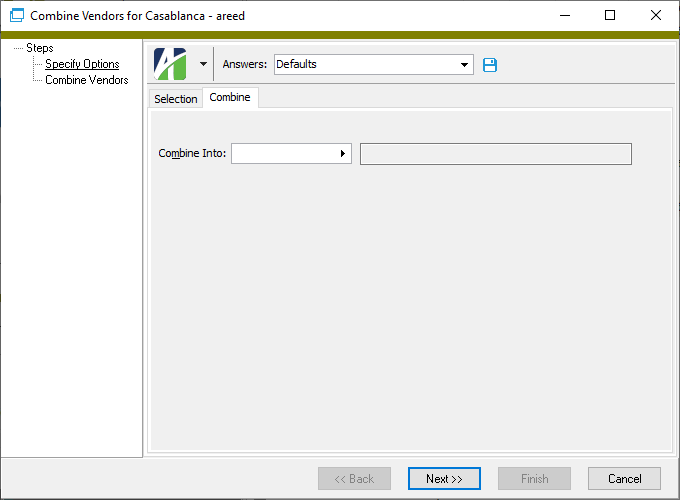
- Click Next >>. ActivityHD prompts you to confirm that you want to combine the selected vendors.
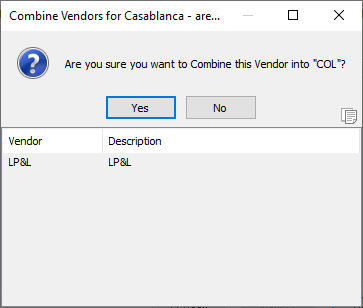
- Click Yes.
- When the process completes, click Finish.
For the purpose of taxation, the federal government and some state governments require businesses to file information documents to advise government agencies and income earners about the amounts paid by the business to the income earners. ActivityHD supports 1099 filing for vendors as well as reporting for California vendors who are deemed independent contractors.
Generate 1099s
The 1099 process creates the 1099 file for electronic submission to the government or for actual printing of 1099 forms. The 1099 transmission is not created if any required information is missing. The 1099 Detail Report can show you the vendors with missing required information.
1099 information is determined by the APCodes assigned to payments. The proper setup of APCodes is essential to the accuracy of 1099 reporting. You can define default 1099 APCodes on vendors who will require a 1099 at year's end. You can change APCodes on payments before or after merge to ensure 1099 information is correct.
When you create an invoice for a vendor, its default APCodes are copied to the invoice record. When a payment is made on the invoice, the APCodes from the invoice are copied to the payment. The 1099 amount is adjusted proportionately based on the payment amount. You can specify multiple APCodes on each invoice and payment so that it is possible to have multiple 1099 types on invoices, payments, and vendors; however, any given APCode can only appear in the table once.
In version 7.28 of ActivityHD, the 1099 process was revamped to make the steps to prepare 1099 Copy B's for your vendors and Copy A's for the IRS more fluid.
Note
In 2020 the IRS introduced Form 1099-NEC which now reports the non-employee compensation data which was formerly reported on Form 1099-MISC. While this resulted in significant changes to the 2020 (and later) Form 1099-MISC, ActivityHD still produces correct 1099s for prior and current tax years.
Generate 1099s is available from the Vendors, 1099s, and 1099 Transmissions folders.
Tip
During the Generate 1099s process, avoid the following common mistakes:
- Do not skip fields marked with an asterisk (*). These fields are required.
- Do not forget to assign a reporting location for each vendor. If you receive an error when you create the 1099 file that indicates the vendor doesn't have a name or if the 1099 Detail Report indicates the vendor is missing address information, the likely culprit is that none of the vendor's locations is specified as a default reporting location.
- Do not leave the Federal ID field on the vendor blank. Each vendor must have a federal ID on record. Per the IRS instructions, be sure to include dashes when entering federal IDs. The federal ID entered on the vendor prints on the 1099s.
- In the Navigation pane, highlight the Accounts Payable > Vendors folder.
- Start the Generate 1099s wizard.
- To generate 1099s for all or a filtered subset of vendors:
- Right-click the Vendors folder and select Select and Generate 1099s from the shortcut menu.
On the Selection tab, define any filters to apply to the vendors.
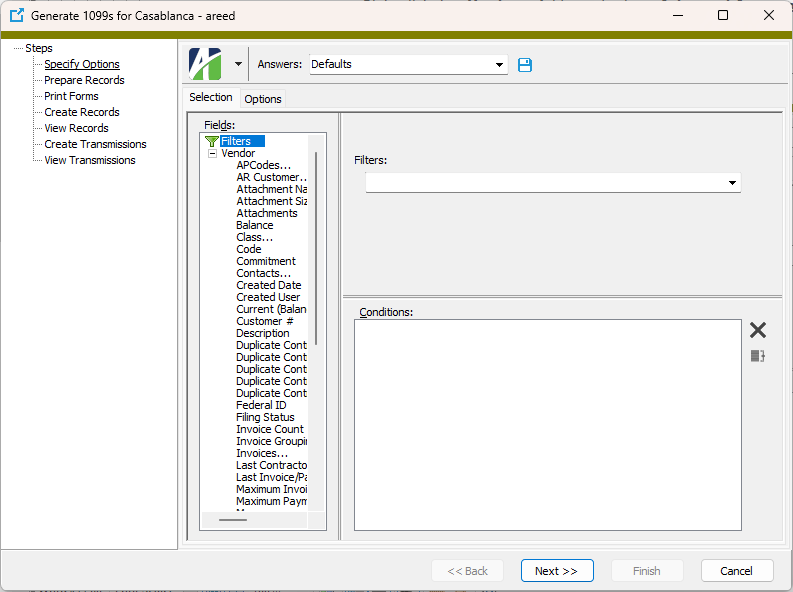
- To generate 1099s for specifically selected vendors:
- In the HD view, select the vendors to include in 1099 generation. You can use Ctrl and/or Shift selection to select multiple vendors.
- Right-click on your selection and select Generate 1099s from the shortcut menu.
Select the Options tab.
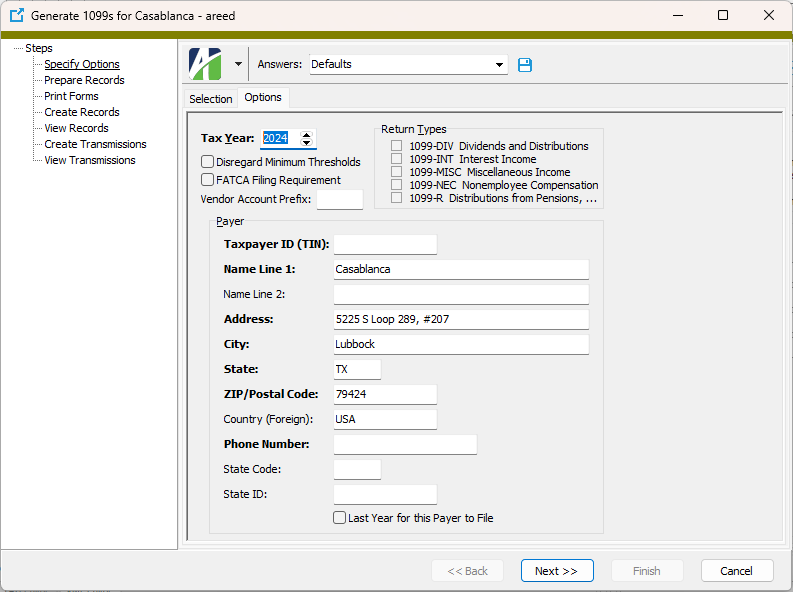
- To generate 1099s for all or a filtered subset of vendors:
- Select the four-digit Tax Year to generate 1099s for.
- This step applies only to sites with multiple companies which share the same Payer TIN. Mark the Disregard Minimum Thresholds checkbox only if you want the process to include vendors with payments less than the minimum threshold reporting amounts. For example, if the threshold is $600 and a vendor has $450 of non-employee compensation, marking the checkbox would cause a 1099-NEC to be generated for the vendor even though the amount is below the threshold amount. For more on reporting 1099 information for multiple companies with the same Payer TIN, follow this link.
- Mark the FATCA Filing Requirement checkbox if your organization must comply with FATCA provisions. If you mark this checkbox, the vendor code will print in the "Account number" box on the 1099 form.
- This step applies only to sites with multiple companies which share the same Payer TIN. The Vendor Account Prefix affects only vendors with the Separate 1099 Form checkbox marked on the Vendor tab of the vendor record. Enter the text to prepend to the vendor account code to form the value that prints in the Account Number box of Form 1099 or that is transmitted in the "Payer's Account Number for Payee" field of the electronic file.
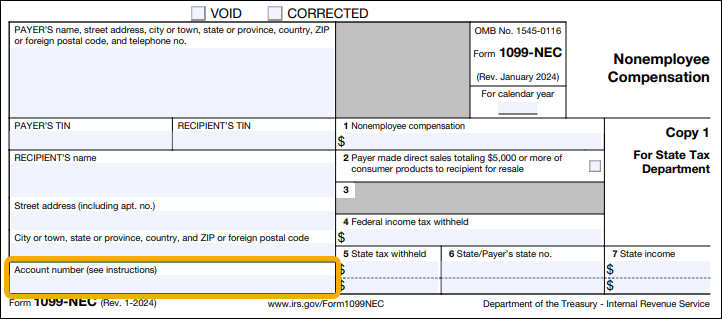
Notes
- The prefix can include a delimiter, if desired. For example, a vendor code of ABCDE with a prefix of xyz- would look like xyz-ABCDE in the Account Number box.
- The "Payer Account for Payee" field is limited to 20 characters in the electronic file. Be mindful of this limitation when setting the prefix.
For more on reporting 1099 information for multiple companies with the same Payer TIN, follow this link.
- In the Return Types section, mark the checkbox for each return type to generate. Your options are:
- 1099-DIV Dividends and Distributions
- 1099-INT Interest Income
- 1099-MISC Miscellaneous Income
- 1099-NEC Nonemployee Compensation
- 1099-R Distribution from Pensions, ...
- In the Taxpayer ID (TIN) field, enter the payer's nine-digit taxpayer identification number (TIN). The TIN may be an employer identification number (EIN), social security number (SSN), or individual taxpayer identification number (ITIN). This field allows up to 11 characters so that you can include dashes in the TIN.
- In the Name Line 1 field, enter the name of the payer whose TIN appears in the Taxpayer ID (TIN) field. This field allows up to 40 characters.
- Use the Name Line 2 field to continue the name of the payer from the Name Line 1 field or leave the field blank. This field allows up to 40 characters.
- In the Address, City, State, ZIP/Postal Code, Country (Foreign), and Phone Number fields, enter address and phone information for the payer's shipping address. The address and city fields allow up to 40 characters each.
-
If the payer participates in the Combined Federal/State Filing Program and/or is required to file paper copies of the 1099 with a state tax entity, enter the abbreviated name of the state in the State Code field.
Note
State reporting is currently only supported for a single state; i.e., there is one payer state code and it is the same for all payments to all vendors. Look for multi-state 1099 reporting in future releases.
- If the payer participates in the Combined Federal/State Filing Program and/or is required to file paper copies of the 1099 with a state tax entity, enter the payer's state identification number assigned by the state in the State ID field.
- If the payer will not be filing 1099s after this year, mark the Last Year for this Payer to File checkbox.
-
Click Next >>.

- If you are ready for ActivityHD to prepare and validate the 1099 data, click OK.
-
ActivityHD prepares and validates the data and reports its results.

If errors are encountered, the error messages are reported here. You cannot continue with 1099 generation until all errors are resolved. 1099s cannot be generated if required information is missing. Run the 1099 Detail Report to see which vendors are missing required information.
If no errors are reported, continue with step 18.
-
Click Next >>.
Use the "Print Forms" step to print Forms 1099 Copy B for mailing to payees.
If you have fewer than ten federal information returns and choose not to file electronically, use this step to also print Forms 1099 Copy A and the 1096 Summary Report for submission to the IRS.

- If the 1099 process builds one or more 1099s which match existing 1099 records (same payer TIN, payee TIN, tax year, and form type), it determines whether each of the new 1099s is a duplicate or a correction. If any of the payer or payee name fields, address fields, or box code amounts differ, the new 1099 is flagged as a correction; otherwise, it is considered a duplicate. The number of duplicates found is reported on the Options tab of the "Print Forms" step. If there is at least one duplicate 1099, the Include Duplicates checkbox is enabled. Mark the checkbox if you want to include duplicates when you print 1099s. To skip reprinting 1099s which may have been printed when the previous 1099 records were created, leave the checkbox cleared.
- In the Return Types section, mark the checkbox for each return type to print. If there are no records of a particular return type to print, its checkbox is disabled. Valid options include:
- 1099-DIV
- 1099-INT
- 1099-MISC
- 1099-NEC
- 1099-R
-
In the Form Design section, select the type of report design to use. Your options are:
- Copies A, B, C - Prints on pre-printed Copy A and/or Copy B and/or Copy C forms.
- Copy B - (Recommended) Prints Copy B forms on blank paper for sending to 1099 recipients. An image of the 1099 form is incorporated in the printing.
- 1096 Summary Report - Prints the 1096 Summary Report of 1099 information for accompanying submission of printed Forms 1099 Copy A to the IRS.
- Custom - Enables the field below so that you can select and print a custom form design.
- In the toolbar, click the icon for the type of output you want:
 - Provides access to two preview options.
- Preview - Click the icon or click the drop-down arrow and select Preview from the drop-down menu to view the report in the Crystal Reports viewer.
- Preview to PDF - Click the drop-down arrow next to the icon and select Preview to PDF to view the report in the PDF reader.
 - Opens the Print dialog so that you can select and configure a printer and then print a paper copy of the report.
 - Opens the Report Email dialog so that you can address and compose an email that the report will be attached to. For best results, ensure your email client is running before you attempt to send a report via email.
 - Opens the Export Report dialog so that you can save the report to a file. File types include Crystal Reports (.rpt), PDF (.pdf), Microsoft Excel (.xls), Microsoft Word (.doc), rich text (.rtf), and XML (.xml).
-
When you finish printing 1099s, click Next >>.

- To create 1099 records for the 1099 forms generated in the process, ensure the Create 1099 Records checkbox is marked. If you clear the checkbox, the Create Attachments checkbox is cleared and disabled.
- If the Create 1099 Records checkbox is marked and you want to create 1099 forms to attach to their corresponding 1099 records, ensure the Create Attachments checkbox is marked. If you want to create records but skip attachments, clear the checkbox.
- If the Create Attachments checkbox is marked, the Design field is enabled. Select the form design to use to create the attachments.
-
Click Next >>. You are prompted to confirm that you want to create 1099 records and attachments.

-
Click Yes.

At this point, you can double-click a 1099 record in the right pane to drill down to the 1099 window.
-
When you finish working with 1099 records, click Next >>.
Use the "Create Transmissions" step to create the electronic 1099 transmission file for submission to the IRS.
This step is not necessary if you printed paper Forms 1099 Copy A for submission to the IRS in the "Print Forms" step. You can click Finish to exit the process.

- In the Original Transmission section, the Filename and Type fields are enabled if original records are detected. If these fields are disabled, skip to step 32. Otherwise, in the Filename field, browse to the folder to save the electronic transmission file to and specify a file name.
- From the Type drop-down list, select the type of transmission file being created. If this is an original transmission, the value defaults to "Original". Valid types are:
- Original
- Replacement
- Correction
- Test. Test transmissions can only be sent through the FIRE Test System at https://fire.test.irs.gov/. Never transmit live data in the FIRE Test System.
- In the Correction Transmission section, the Filename and Type fields are enabled if correction records are detected. If these fields are disabled, skip to step 33. Otherwise, in the Filename field, browse to the folder to save the electronic transmission file to and specify a file name.
- From the Type drop-down list, select the type of transmission file being created. If this is a correction transmission, the value defaults to "Correction". Valid types are:
- Original
- Replacement
- Correction
- Test. Test transmissions can only be sent through the FIRE Test System at https://fire.test.irs.gov/. Never transmit live data in the FIRE Test System.
- In the Transmitter TIN field, enter the transmitter's nine-digit taxpayer identification number (TIN). The TIN may be an employer identification number (EIN), social security number (SSN), or individual taxpayer identification number (ITIN).
- In the Transmitter Control Code field, enter the five-character code assigned to you by the IRS. You must have a Transmitter Control Code (TCC) to submit 1099 information electronically.
- In the Transmitter Name 1 field, enter the usual business name of the transmitter. If you need a second line for the name, use the Transmitter Name 2 field.
- In the Company Name 1 field, enter the name of the company to which correspondence about the electronic transmission should be directed. If you need a second line for the company name, use the Company Name 2 field.
- In the Company Address; Company City, State, Zip; and Country (Foreign) fields, enter address details about the address to which correspondence about the electronic transmission should be sent.
- In the Contact Name field, enter the name of the person the IRS should contact regarding problems with the electronic file or its transmission.
- Enter the Contact Phone Number.
- Enter the Contact Email Address.
- Click Next >>. You are prompted to confirm that you want to create the 1099 electronic transmission file.
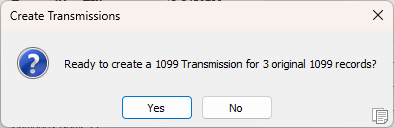
- Click Yes.
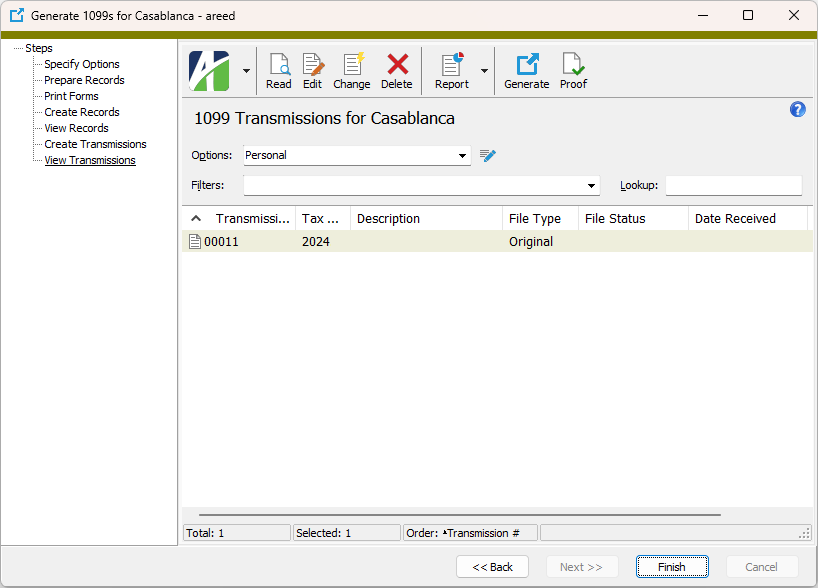
At this point, you can double-click a 1099 transmission record in the right pane to drill down to the 1099 Transmission window.
- When you finish working with 1099 transmission records, click Finish.
Note
Vendors that do not meet the $600 reporting threshold will be excluded from validation. They will not cause missing-information errors, and 1099s will not be generated for these vendors.
![]() Submit a 1099 transmission to the IRS
Submit a 1099 transmission to the IRS
To submit 1099 forms electronically, use the IRS's FIRE system: https://fire.irs.gov.
The IRS requires organizations with 10 or more information returns to file them electronically. The IRS encourages filers with fewer than 10 information returns to file electronically.
In order to file you will need a Transmitter Control Code (TCC). If you last submitted a TCC application prior to 9/26/2021, you must complete and submit a new application. If you need a TCC, log into IRS Application for TCC.
After you have a TCC, go to the FIRE website and create a new account if you have not already.
After you have a TCC and a FIRE account, log onto the system and upload the 1099 file.

Reporting 1099 information for multiple companies with the same Payer TIN
The following items are required for proper processing of 1099s when multiple ActivityHD companies share the same Payer TIN:
- The company information (payer name, address, and TIN) must be identical for all companies which share the same TIN.
- The Separate 1099 Form checkbox must be marked on all reportable vendors in all ActivityHD companies.
- The length of the vendor account prefix plus the longest reportable vendor code must not exceed 20 characters.
- In the Generate 1099s process:
- Mark the Disregard Minimum Thresholds checkbox.
- In the Vendor Account Prefix field, enter the company prefix. Each company's prefix must be unique among all ActivityHD companies; however, ActivityHD does not validate uniqueness.
Create saved answers to store settings for each company.
Note
A company's vendor account prefix must be the same each time the Generate 1099s process is run in order for corrections to work properly.
Vendor Labels
Purpose
Vendor Labels produces a list of vendor addresses formatted for label printing. You specify which type of vendor location to use as the address source.
Content
For each vendor included, the labels show:
- vendor name and description
- vendor address.
Print the report
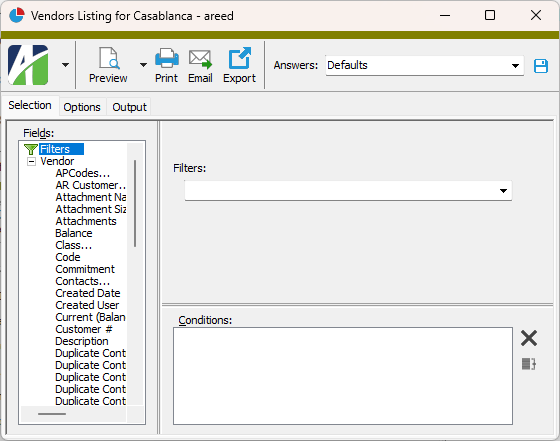
- In the Navigation pane, highlight the Accounts Payable > Vendors folder.
- Start the report set-up wizard.
- To create labels for all or a filtered subset of vendors:
- Right-click the Vendors folder and select Select and Report > Vendor Labels from the shortcut menu.
- On the Selection tab, define any filters to apply to the data.
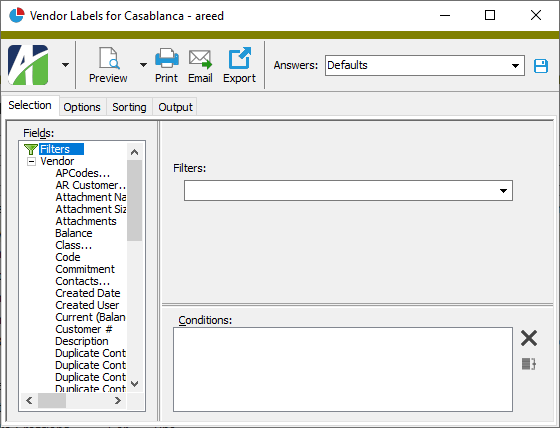
- To create labels for specifically selected vendors:
- In the HD view, select the vendors to include on the report. You can use Ctrl and/or Shift selection to select multiple records.
- Click
 and select Vendor Labels from the drop-down menu.
- To create a label for a particular vendor from the Vendor window:
- In the HD view, locate and double-click the vendor you want to create a label for. The Vendor window opens with the vendor loaded.
- Click and select Vendor Labels from the drop-down menu.
- To create labels for all or a filtered subset of vendors:
- Select the Options tab.
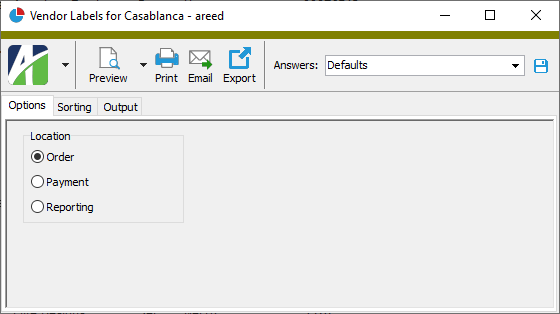
- In the Location field, select the type of location to use as the source of addresses for the labels. Your options are:
- Order
- Payment
- Reporting
- Select the Sorting tab.
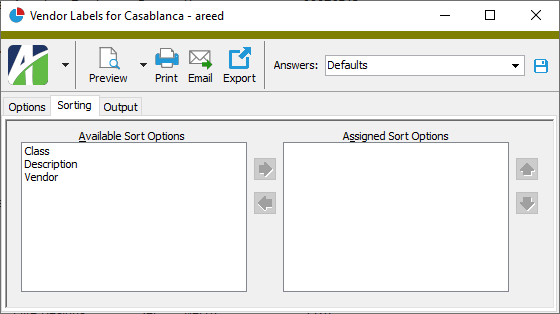
- In the Available Sort Options list box, highlight the field(s) to sort the labels by, then click
 to move your selection(s) to the Assigned Sort Options list box.
 - If you selected multiple sort fields, use
 and
and  to arrange the sort fields in the order you want them applied.
 - Select the Output tab.
- In the Design field, look up and select the report design to use.
There are four built-in vendor label designs:
- Folder 3 Across Labels - This design is set up for 3-across folder labels.
- Vendor 3 Across Labels - This design is set up for 3-across address labels.
- Vendor Labels - This design is set up for 2-across address labels.
- Vendor Mailing Labels - The address block for these labels does not include the vendor code.
- In the toolbar, click the icon for the type of output you want:
- - Provides access to two preview options.
- Preview - Click the icon or click the drop-down arrow and select Preview from the drop-down menu to view the report in the Crystal Reports viewer.
- Preview to PDF - Click the drop-down arrow next to the icon and select Preview to PDF to view the report in the PDF reader.
- - Opens the Print dialog so that you can select and configure a printer and then print a paper copy of the report.
- - Opens the Report Email dialog so that you can address and compose an email that the report will be attached to. For best results, ensure your email client is running before you attempt to send a report via email.
- - Opens the Export Report dialog so that you can save the report to a file. File types include Crystal Reports (.rpt), PDF (.pdf), Microsoft Excel (.xls), Microsoft Word (.doc), rich text (.rtf), and XML (.xml).
Data extensions
The following data extension is available for the report:
- Vendors
Vendors Listing
Purpose
The Vendors Listing provides a list of the vendors tracked in Accounts Payable.
Content
For each vendor included on the report, the listing shows:
- vendor description
- vendor class
- default payment terms
- "pay by" days
- preferred payment method
- customer number.
In addition, you can include one or more of the following:
- vendor ID and controls
- PO defaults
- GL defaults
- default APCodes
- vendor locations
- vendor contacts
- federal ID
- timestamps
- memos
- custom fields.
The following total appears on the report:
- record count.
Print the report
- In the Navigation pane, highlight the Accounts Payable > Vendors folder.
- Start the report set-up wizard.
- To report on all or a filtered subset of vendors:
- Right-click the Vendors folder and select Select and Report > Vendors Listing from the shortcut menu.
- On the Selection tab, define any filters to apply to the data.
- To report on specifically selected vendors:
- In the HD view, select the vendors to include on the report. You can use Ctrl and/or Shift selection to select multiple records.
- Click and select Vendors Listing from the drop-down menu.
- To report on a particular vendor from the Vendor window:
- In the HD view, locate and double-click the vendor to report on. The Vendor window opens with the vendor loaded.
- Click and select Vendors Listing from the drop-down menu.
- To report on all or a filtered subset of vendors:
- Select the Options tab.
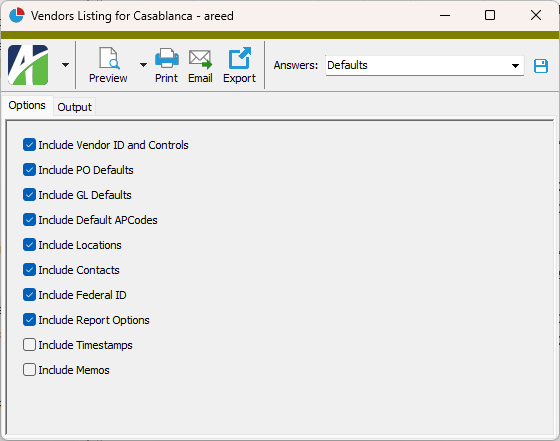
- Mark the checkbox(es) for the additional information to include:
- Vendor ID and Controls
- PO Defaults
- GL Defaults
- Default APCodes
- Locations
- Contacts
- Federal ID
- Report Options. To include a section at the end of the report with the report settings used to produce the report, leave the checkbox marked. To produce the report without this information, clear the checkbox.
- Timestamps
- Memos
- Custom Fields (only visible if custom fields are set up)
- Select the Output tab.
- In the Design field, look up and select the report design to use.
- In the toolbar, click the icon for the type of output you want:
- - Provides access to two preview options.
- Preview - Click the icon or click the drop-down arrow and select Preview from the drop-down menu to view the report in the Crystal Reports viewer.
- Preview to PDF - Click the drop-down arrow next to the icon and select Preview to PDF to view the report in the PDF reader.
- - Opens the Print dialog so that you can select and configure a printer and then print a paper copy of the report.
- - Opens the Report Email dialog so that you can address and compose an email that the report will be attached to. For best results, ensure your email client is running before you attempt to send a report via email.
- - Opens the Export Report dialog so that you can save the report to a file. File types include Crystal Reports (.rpt), PDF (.pdf), Microsoft Excel (.xls), Microsoft Word (.doc), rich text (.rtf), and XML (.xml).
Data extensions
The following data extensions are available for the report:
- Vendors
- Locations
- Contacts
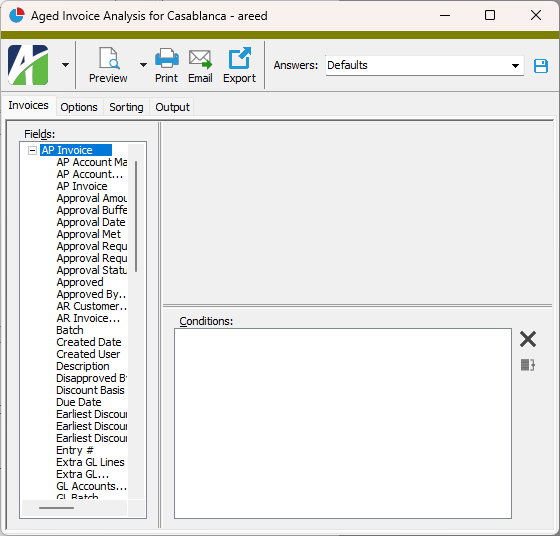
AP Aged Invoice Analysis
Purpose
Invoice aging categorizes outstanding invoices by how long they have gone unpaid. The Aged Invoice Analysis report shows amounts owed to vendors by aging category. This report is useful for determining cash outflow.
Content
For each vendor included on the report, the report shows:
- vendor name
- vendor balance
- vendor totals by aging category.
In addition, you can include:
- invoice information.
If you include invoice information, for each invoice represented on the report, the report shows:
- invoice number
- due date
- invoice balance
- invoice amount by aging category.
The following totals appear on the report:
- grand totals for balance and aging categories.
Preinstalled saved answers
For your convenience, ActivityHD includes two preinstalled saved answers for common reporting scenarios:
- "Current Aging"
- "Reconcile to General Ledger"
Print the report
- In the Navigation pane, highlight the Accounts Payable > Vendors folder.
- Start the report set-up wizard.
- To report on all or a filtered subset of vendors:
- Right-click the Vendors folder and select Select and Report > Aged Invoice Analysis from the shortcut menu.
- On the Selection tab, define any filters to apply to the data.
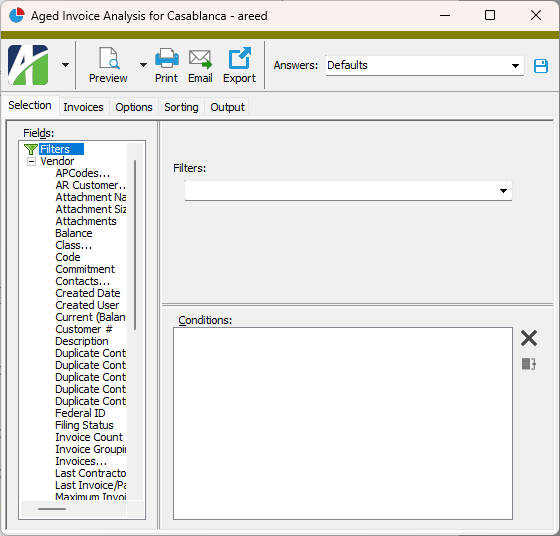
- To report on specifically selected vendors:
- In the HD view, select the vendors to include on the report. You can use Ctrl and/or Shift selection to select multiple records.
- Click and select Aged Invoice Analysis from the drop-down menu.
- To report on a particular vendor from the Vendor window:
- In the HD view, locate and double-click the vendor to report on. The Vendor window opens with the vendor loaded.
- Click and select Aged Invoice Analysis from the drop-down menu.
- To report on all or a filtered subset of vendors:
- Select the Invoices tab.
- Define any filters you want to apply to invoices represented in the data.
- Select the Options tab.
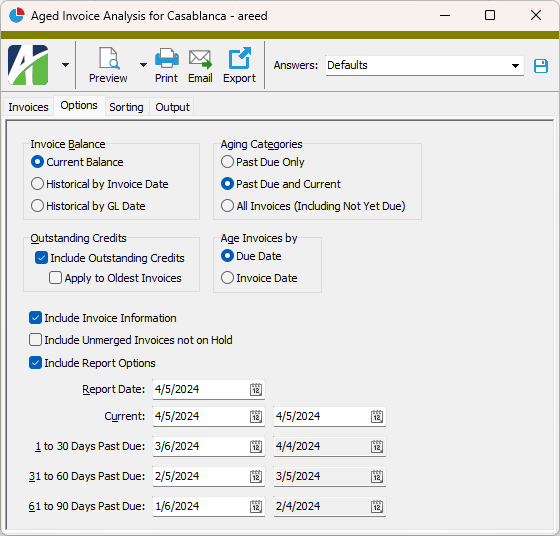
- In the Invoice Balance field, select how to present the invoice balance. Your options are:
- Current Balance
- Historical by Invoice Date
- Historical by GL Date
- In the Aging Categories field, select which aging information you want to show on the report. Your options are:
- Past Due Only
- Past Due and Current
- All Invoices (Including Not Yet Due)
- In the Outstanding Credits section, indicate how to handle outstanding credits.
- To include outstanding credits on the report and age them in the appropriate aging column based on their due date, mark the Include Outstanding Credits checkbox. To exclude outstanding credits, clear the checkbox.
- If you marked the Include Outstanding Credits checkbox, the Apply to Oldest Invoices checkbox is enabled. Mark the checkbox if you want to include all credit-balance invoices, even those not yet due, and apply them to the oldest aging columns with outstanding balances. If you do not mark the checkbox, and if you are not including "Not Yet Due" invoices, then credit-balance invoices that are not yet due are excluded.
- In the Age Invoices By field, select the date to base aging on. Your options are:
- Due Date
- Invoice Date
- In the Report Vendors By field, select the primary sort for the report. Your options are:
- Code. Sorts by vendor code.
- Description. Sorts by vendor description.
Note
Because the vendor description is not required on vendors, the report adds "Code" as an additional sort even when "Description" is selected.
- To show invoice detail, mark the Include Invoice Information checkbox.
- To include unmerged invoices if they are not on merge hold, mark the Include Unmerged Invoices not on Hold checkbox.
- To include a section at the end of the report with the report settings used to produce the report, leave the Include Report Options checkbox marked. To produce the report without this information, clear the checkbox.
- In the Report Date field, enter the date from which to calculate historical balances. The remaining date fields default to values based on this date and on the aging categories.
- If you need to override the aging category date ranges, enter the correct range of dates for the "Current" category and any beginning date ranges which need to change. ActivityHD automatically calculates the ending dates for you. The date ranges must be contiguous and continuous.
-
Select the Sorting tab.
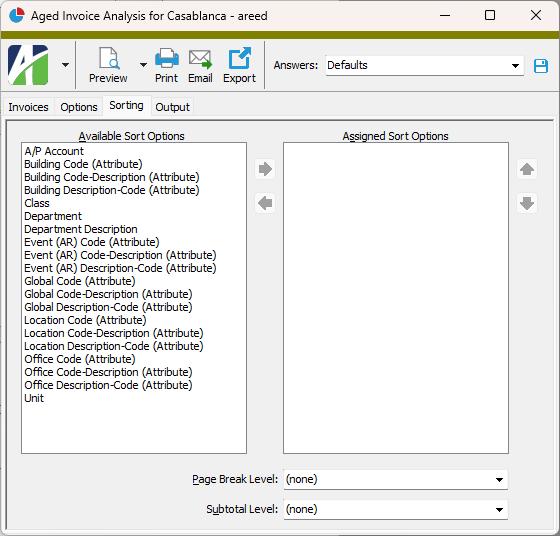
- In the Available Sort Options list box, highlight the field(s) to sort the report by, then click to move your selection(s) to the Assigned Sort Options list box.
- If you selected multiple sort fields, use and to arrange the sort fields in the order you want them applied.
- If you want the report to start a new page for each change in one of the sorting options you specified, select the sorting option to break on from the Page Break Level drop-down list. If you do not want to insert page breaks, accept "(none)".
- If you want the report to subtotal based on one of the sorting options you specified, select the sorting option to subtotal on from the Subtotal Level drop-down list. If you do not want to show subtotals, accept "(none)".
- Select the Output tab.
- In the Design field, look up and select the report design to use.
- In the toolbar, click the icon for the type of output you want:
- - Provides access to two preview options.
- Preview - Click the icon or click the drop-down arrow and select Preview from the drop-down menu to view the report in the Crystal Reports viewer.
- Preview to PDF - Click the drop-down arrow next to the icon and select Preview to PDF to view the report in the PDF reader.
- - Opens the Print dialog so that you can select and configure a printer and then print a paper copy of the report.
- - Opens the Report Email dialog so that you can address and compose an email that the report will be attached to. For best results, ensure your email client is running before you attempt to send a report via email.
- - Opens the Export Report dialog so that you can save the report to a file. File types include Crystal Reports (.rpt), PDF (.pdf), Microsoft Excel (.xls), Microsoft Word (.doc), rich text (.rtf), and XML (.xml).
Data extensions
The following data extensions are available for the report:
- Vendors
- Invoices
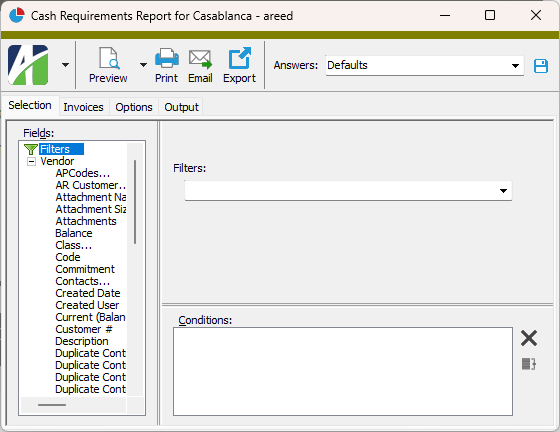
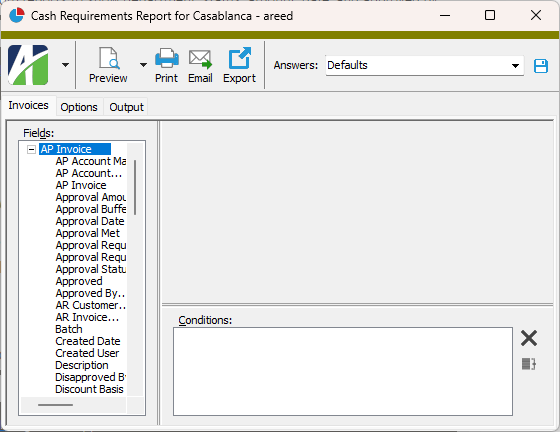
Cash Requirements Report
Purpose
The Cash Requirements Report lists outstanding invoices by vendor and amounts due by date range. You can use this report to project cash needs and to manage cash flow.
Content
For each vendor included on the report, the report shows:
- vendor description
- vendor class
- outstanding invoices for the vendor
- balance due to the vendor.
For each invoice included on the report, the report shows:
- invoice number
- due date
- balance
- amounts due by date range.
In addition, you can include one or more of the following:
- invoices due before the earliest date in your date ranges
- invoices due after the latest date in your date ranges
- vendors with a balance of zero.
The following totals appear on the report:
- grand totals.
Print the report
- In the Navigation pane, highlight the Accounts Payable > Vendors folder.
- Start the report set-up wizard.
- To report on all or a filtered subset of vendors:
- Right-click the Vendors folder and select Select and Report > Cash Requirements Report from the shortcut menu.
- On the Selection tab, define any filters to apply to the data.
- To report on specifically selected vendors:
- In the HD view, select the vendors to include on the report. You can use Ctrl and/or Shift selection to select multiple records.
- Click and select Cash Requirements Report from the drop-down menu.
- To report on a particular vendor from the Vendor window:
- In the HD view, locate and double-click the vendor to report on. The Vendor window opens with the vendor loaded.
- Click and select Cash Requirements Report from the drop-down menu.
- To report on all or a filtered subset of vendors:
- Select the Invoices tab.
- Define any filters you want to apply to invoices represented in the data.
- Select the Options tab.
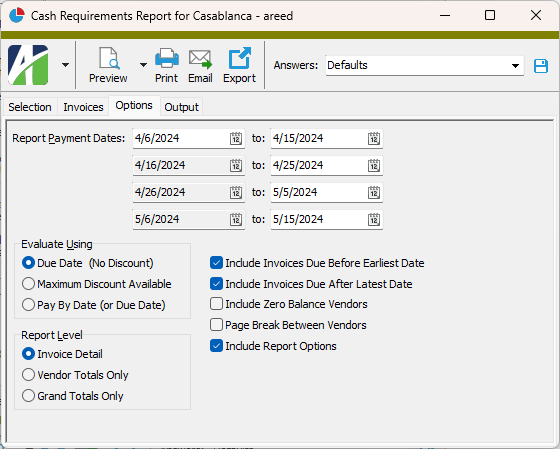
- Use the Report Payment Dates fields to define four contiguous payment date ranges to use for your cash requirements analysis. In the first row, enter the beginning and ending dates for the first payment date range. The remaining beginning dates are calculated from the ending date of the prior date range. Enter the ending dates for the remaining ranges.
- In the Evaluate Using field, select the date to base your analysis on. Your options are:
- Due Date (No Discount)
- Maximum Discount Available
- Pay By Date (or Due Date)
- In the Report Level field, select the level of detail you want to see on the report. Your options are:
- Invoice Detail
- Vendor Totals Only
- Grand Totals Only
- Mark the checkbox(es) for the additional information to include:
- Invoices Due Before Earliest Date
- Invoices Due After Latest Date
- Zero Balance Vendors
- If you selected "Invoice Detail" in the Report Level field, the Page Break Between Vendors checkbox is enabled. Mark the checkbox if you want information for each vendor to start on a new page.
- To include a section at the end of the report with the report settings used to produce the report, leave the Include Report Options checkbox marked. To produce the report without this information, clear the checkbox.
- Select the Output tab.
- In the Design field, look up and select the report design to use.
- In the toolbar, click the icon for the type of output you want:
- - Provides access to two preview options.
- Preview - Click the icon or click the drop-down arrow and select Preview from the drop-down menu to view the report in the Crystal Reports viewer.
- Preview to PDF - Click the drop-down arrow next to the icon and select Preview to PDF to view the report in the PDF reader.
- - Opens the Print dialog so that you can select and configure a printer and then print a paper copy of the report.
- - Opens the Report Email dialog so that you can address and compose an email that the report will be attached to. For best results, ensure your email client is running before you attempt to send a report via email.
- - Opens the Export Report dialog so that you can save the report to a file. File types include Crystal Reports (.rpt), PDF (.pdf), Microsoft Excel (.xls), Microsoft Word (.doc), rich text (.rtf), and XML (.xml).
Data extensions
The following data extension is available for the report:
- Vendors
Invoice Payment Analysis
Purpose
The Invoice Payment Analysis report shows invoice and payment transactions by vendor.
Content
For each vendor included on the report, the report shows:
- vendor name
- information about invoice and payment transactions
- vendor totals.
For each transaction included on the report, the report shows:
- transaction date
- transaction type
- reference
- merge number
- payment number
- invoice or payment amount
- balance.
In addition, you can include one or more of the following:
- voided payments
- voided invoices
- invoices on payment hold
- PO commitments
- zero balance/no activity vendors.
The following totals appear on the report:
- grand totals.
Print the report
- In the Navigation pane, highlight the Accounts Payable > Vendors folder.
- Start the report set-up wizard.
- To report on all or a filtered subset of vendors:
- Right-click the Vendors folder and select Select and Report > Invoice Payment Analysis from the shortcut menu.
- On the Selection tab, define any filters to apply to the data.

- To report on specifically selected vendors:
- In the HD view, select the vendors to include on the report. You can use Ctrl and/or Shift selection to select multiple records.
- Click and select Invoice Payment Analysis from the drop-down menu.
- To report on a particular vendor from the Vendor window:
- In the HD view, locate and double-click the vendor to report on. The Vendor window opens with the vendor loaded.
- Click and select Invoice Payment Analysis from the drop-down menu.
- To report on all or a filtered subset of vendors:
- Select the Detail tab.
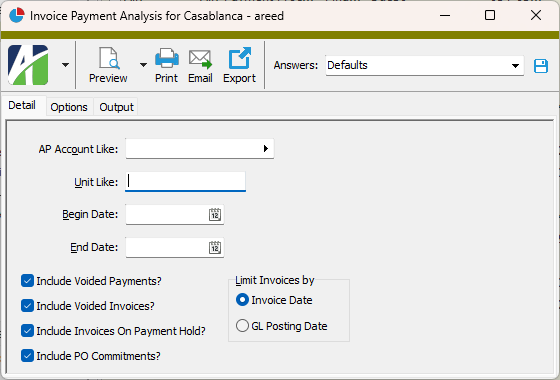
- In the AP Account Like field, enter an account mask or a specific AP account number if you want to restrict the report to transactions with certain AP accounts.
- In the Unit Like field, enter a unit mask or a specific unit to restrict the report to transactions that reference items with certain units.
- In the Begin Date and End Date fields, enter the range of dates for which to include transactions on the report.
- Mark the checkbox(es) for the additional information to include:
- Voided Payments
- Voided Invoices
- Invoices on Payment Hold
- PO Commitments
- In the Limit Options by field, select the type of date to use to determine if an invoice meets your date range criteria. Your options are:
- Invoice Date
- GL Posting Date
- Select the Options tab.
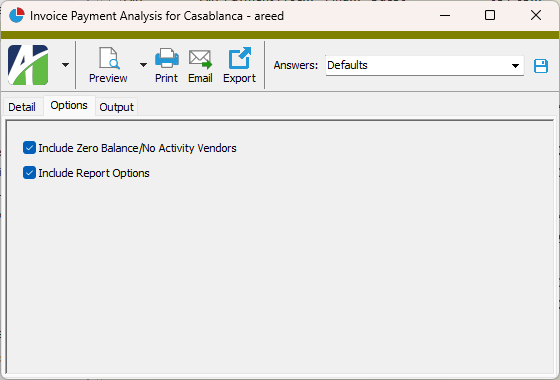
- If you want the report to show transactions for vendors with a zero balance or with no activity in the date range you specified, mark the Include Zero Balances/No Actvity Vendors checkbox.
- To include a section at the end of the report with the report settings used to produce the report, leave the Include Report Options checkbox marked. To produce the report without this information, clear the checkbox.
- Select the Output tab.
- In the Design field, look up and select the report design to use.
- In the toolbar, click the icon for the type of output you want:
- - Provides access to two preview options.
- Preview - Click the icon or click the drop-down arrow and select Preview from the drop-down menu to view the report in the Crystal Reports viewer.
- Preview to PDF - Click the drop-down arrow next to the icon and select Preview to PDF to view the report in the PDF reader.
- - Opens the Print dialog so that you can select and configure a printer and then print a paper copy of the report.
- - Opens the Report Email dialog so that you can address and compose an email that the report will be attached to. For best results, ensure your email client is running before you attempt to send a report via email.
- - Opens the Export Report dialog so that you can save the report to a file. File types include Crystal Reports (.rpt), PDF (.pdf), Microsoft Excel (.xls), Microsoft Word (.doc), rich text (.rtf), and XML (.xml).
Data extensions
The following data extension is available for the report:
- Vendors
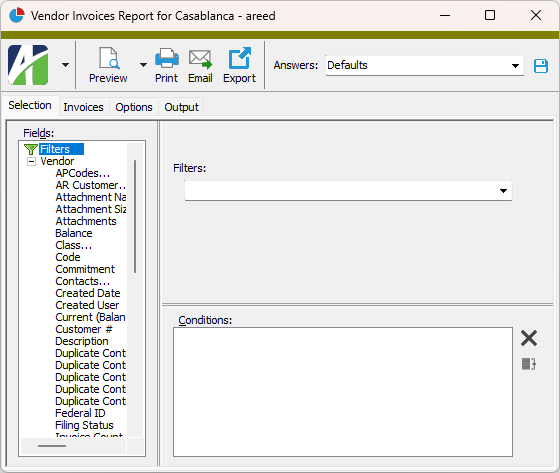
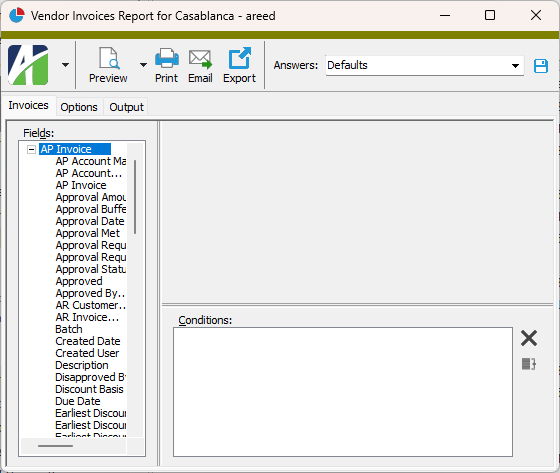
Vendor Invoices Report
Purpose
The Vendor Invoices Report summarizes invoice information by vendor.
Content
For each vendor included on the report, the report shows:
- vendor description
- number of invoices
- amount of invoices
- balance.
In addition, you can include one or more of the following:
- invoice detail (invoice date, invoice number, invoice description, GL batch - entry number, source, amount, GL date, batch-entry number, AP account, merge number, purchase order number, due date, balance, whether the invoice is on merge hold, whether the invoice is on payment hold, whether the invoice has been voided, invoice status)
- approval status (department, status, approval amount, approval date, and approved by) [only available when Purchasing is installed and AP invoice approval is enabled]
- approval history (approval date, removed date, approval level, approval status, approved by, approval amount, approval notes) [only available when Purchasing is installed and AP invoice approval is enabled]
- payment location, terms, and payment detail (payment address; terms code, due date, basis, pay by date; payment date, reference, merge number, net payment)
- attributes (both invoice usage and invoice detail usage attributes)
- APCodes (code, description, type, basis, percent, amount)
- GL detail (for each detail line: line number, GL account and description, unit, debit or credit amount; GL summary)
- extra GL (for each detail line: line number, extra GL account, account description, date, unit, debit or credit amount; extra GL summary)
- GL Summary section (unit; for each account: account number, account description, total debits, total credits)
- timestamps
- memos
- custom fields.
The following totals appear on the report:
- vendor totals
- invoice count, amount, balance
- commitment count, amount, balance
- vendor total amount, total balance
- grand totals
- invoice count, amount, balance
- commitment count, amount, balance
- grand total amount, total balance.
Print the report
- In the Navigation pane, highlight the Accounts Payable > Vendors folder.
- Start the report set-up wizard.
- To report on all or a filtered subset of vendors:
- Right-click the Vendors folder and select Select and Report > Vendor Invoices Report from the shortcut menu.
- On the Selection tab, define any filters to apply to the data.
- To report on specifically selected vendors:
- In the HD view, select the vendors to include on the report. You can use Ctrl and/or Shift selection to select multiple records.
- Click and select Vendor Invoices Report from the drop-down menu.
- To report on a particular vendor from the Vendor window:
- In the HD view, locate and double-click the vendor to report on. The Vendor window opens with the vendor loaded.
- Click and select Vendor Invoices Report from the drop-down menu.
- To report on all or a filtered subset of vendors:
- Select the Invoices tab.
- Define any filters you want to apply to invoices represented in the data.
- Select the Options tab.
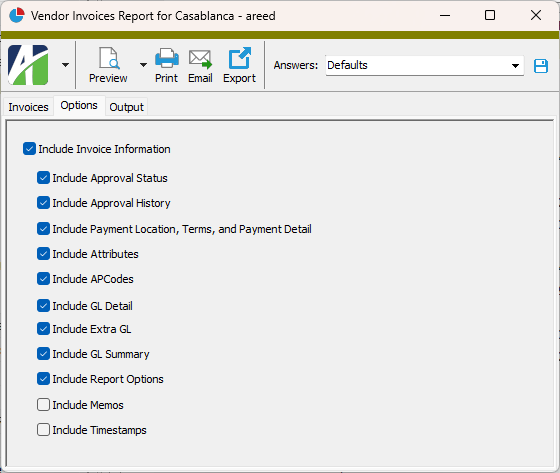
- If you want to include invoice details on the report, mark the Include Invoice Information checkbox. The remaining checkboxes are enabled.
- Mark the checkbox(es) for the additional information to include:
- Approval Status (only visible when Purchasing is installed and AP invoice approval is enabled)
- Approval History (only visible when Purchasing is installed and AP invoice approval is enabled)
- Payment Location, Terms, and Payment Detail
- Attributes
- APCodes
- GL Detail
- Extra GL
- GL Summary
- Report Options. To include a section at the end of the report with the report settings used to produce the report, leave the checkbox marked. To produce the report without this information, clear the checkbox.
- Memos
- Timestamps
- Custom Fields (only visible if custom fields are set up)
- Select the Output tab.
- In the Design field, look up and select the report design to use.
- In the toolbar, click the icon for the type of output you want:
- - Provides access to two preview options.
- Preview - Click the icon or click the drop-down arrow and select Preview from the drop-down menu to view the report in the Crystal Reports viewer.
- Preview to PDF - Click the drop-down arrow next to the icon and select Preview to PDF to view the report in the PDF reader.
- - Opens the Print dialog so that you can select and configure a printer and then print a paper copy of the report.
- - Opens the Report Email dialog so that you can address and compose an email that the report will be attached to. For best results, ensure your email client is running before you attempt to send a report via email.
- - Opens the Export Report dialog so that you can save the report to a file. File types include Crystal Reports (.rpt), PDF (.pdf), Microsoft Excel (.xls), Microsoft Word (.doc), rich text (.rtf), and XML (.xml).
Data extensions
The following data extensions are available for the report:
- Vendors
- Invoices
- Invoice APCodes
- Payment invoices
- Invoice AP extra GL
- Invoice approval history (only available when Purchasing is installed and AP invoice approval is enabled)
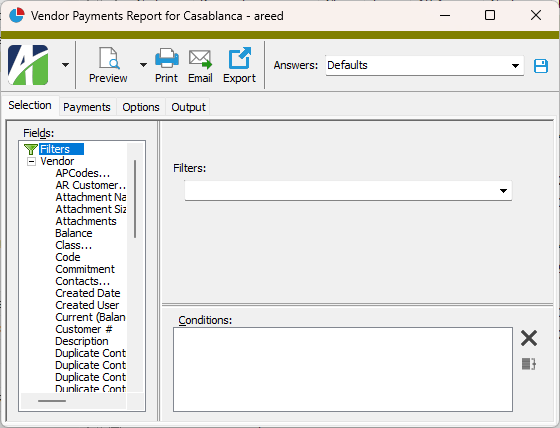
Vendor Payments Report
Purpose
The Vendor Payments Report summarizes payment information by vendor.
Content
For each vendor included on the report, the report shows:
- vendor description
- number of payments
- gross payment amount
- discount amount
- amount withheld
- amount reported
- net payment amount.
In addition, you can include one or more of the following:
- payment detail (payment date, reference, description, whether payment is on merge hold, bank account, net payment, amount withheld, gross payment, merge number, batch - entry number, source, type, whether the payment has been voided, discount account, discount amount, amount reported, GL batch name - entry number)
- invoice detail (invoice number, invoice date, description, amount, balance, discount amount, net payment, amount withheld, gross amount)
- APCodes (invoice number, code, code description, type, basis, percent, amount)
- payment distributions (invoice number, distribution date, distribution account, unit, invoice distribution amount, payment distribution amount)
- GL detail (for each detail line: line number, GL detail account, unit, debit or credit amount; GL summary)
- addresses and timestamps
- memos
- custom fields.
The following totals appear on the report:
- grand totals.
Print the report
- In the Navigation pane, highlight the Accounts Payable > Vendors folder.
- Start the report set-up wizard.
- To report on all or a filtered subset of vendors:
- Right-click the Vendors folder and select Select and Report > Vendor Payments Report from the shortcut menu.
- On the Selection tab, define any filters to apply to the data.
- To report on specifically selected vendors:
- In the HD view, select the vendors to include on the report. You can use Ctrl and/or Shift selection to select multiple records.
- Click and select Vendor Payments Report from the drop-down menu.
- To report on a particular vendor from the Vendor window:
- In the HD view, locate and double-click the vendor to report on. The Vendor window opens with the vendor loaded.
- Click and select Vendor Payments Report from the drop-down menu.
- To report on all or a filtered subset of vendors:
- Select the Payments tab.
- Define any filters you want to apply to payments represented in the data.
- Select the Options tab.
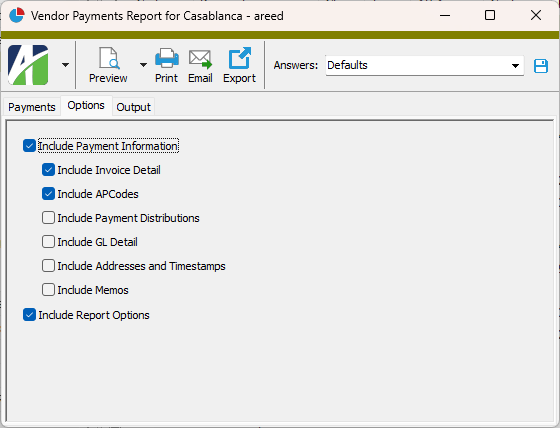
- If you want to include payment details on the report, mark the Include Payment Information checkbox. The remaining checkboxes are enabled.
- Mark the checkbox(es) for the additional information to include:
- Invoice Detail
- APCodes
- Payment Distributions
- GL Detail
- Addresses and Timestamps
- Memos
- Custom Fields (only visible if custom fields are set up)
- To include a section at the end of the report with the report settings used to produce the report, leave the Include Report Options checkbox marked. To produce the report without this information, clear the checkbox.
- Select the Output tab.
- In the Design field, look up and select the report design to use.
- In the toolbar, click the icon for the type of output you want:
- - Provides access to two preview options.
- Preview - Click the icon or click the drop-down arrow and select Preview from the drop-down menu to view the report in the Crystal Reports viewer.
- Preview to PDF - Click the drop-down arrow next to the icon and select Preview to PDF to view the report in the PDF reader.
- - Opens the Print dialog so that you can select and configure a printer and then print a paper copy of the report.
- - Opens the Report Email dialog so that you can address and compose an email that the report will be attached to. For best results, ensure your email client is running before you attempt to send a report via email.
- - Opens the Export Report dialog so that you can save the report to a file. File types include Crystal Reports (.rpt), PDF (.pdf), Microsoft Excel (.xls), Microsoft Word (.doc), rich text (.rtf), and XML (.xml).
Data extensions
The following data extensions are available for the report:
- Payments
- Vendors
- Invoices
- Payment invoices
- Invoice GL detail
- Payment APCodes
- Payment GL detail
1099 Detail Report
Purpose
For each vendor in your selection, the 1099 Detail Report shows 1099 amounts by return type during a specified date range.
Content
For each vendor on the report, the report shows:
- vendor name
- vendor federal ID number
- 1099 income type
- 1099 total for transactions in the date range.
In addition, you can include one or more of the following:
- payment detail (payment date, reference, merge number; invoice date, invoice number, merge number; invoice payment APCode, gross payment, amount)
- reporting location.
The following total appears on the report:
- record count.
Preinstalled saved answers
For your convenience, ActivityHD includes four preinstalled saved answers for common reporting scenarios.

Print the report
- In the Navigation pane, highlight the Accounts Payable > Vendors folder.
- Start the report set-up wizard.
- To report on all or a filtered subset of vendors:
- Right-click the Vendors folder and select Select and Report > 1099 Detail Report from the shortcut menu.
- On the Selection tab, define any filters to apply to the data.

- To report on specifically selected vendors:
- In the HD view, select the vendors to include on the report. You can use Ctrl and/or Shift selection to select multiple records.
- Click and select 1099 Detail Report from the drop-down menu.
- To report on a particular vendor from the Vendor window:
- In the HD view, locate and double-click the vendor to report on. The Vendor window opens with the vendor loaded.
- Click and select 1099 Detail Report from the drop-down menu.
- To report on all or a filtered subset of vendors:
- Select the Detail tab.

- In the Payment Begin Date and Payment End Date fields, enter the range of vendor payment dates for which to include transaction information on the report.
- In the Return Types section, ensure that the checkbox is marked for each 1099 return type you want to include on the report. Your options are:
- 1099-DIV Dividends and Distributions
- 1099-INT Interest Income
- 1099-MISC Miscellaneous Income
- 1099-NEC Nonemployee Compensation
- 1099-R Distributions from Pensions, ...
- Select the Options tab.

- If you only want to show vendors on the report that would be included in the 1099 creation process, mark the Apply Minimum Amount Limits checkbox.
- If you want to suppress transaction detail and show only 1099 totals for each vendor, mark the Totals Only checkbox. If you mark this checkbox, the remaining checkboxes on the tab are disabled; skip to step 11.
- If you want to limit the report to vendors who are missing required 1099 information or whose combined address fields exceed 40 characters, mark the Only Show Vendors with Validation Errors checkbox.
- Mark the checkbox(es) for the additional information to include:
- Payment Detail
- Reporting Location
- To include a section at the end of the report with the report settings used to produce the report, leave the Include Report Options checkbox marked. To produce the report without this information, clear the checkbox.
- Select the Output tab.
- In the Design field, look up and select the report design to use.
- In the toolbar, click the icon for the type of output you want:
- - Provides access to two preview options.
- Preview - Click the icon or click the drop-down arrow and select Preview from the drop-down menu to view the report in the Crystal Reports viewer.
- Preview to PDF - Click the drop-down arrow next to the icon and select Preview to PDF to view the report in the PDF reader.
- - Opens the Print dialog so that you can select and configure a printer and then print a paper copy of the report.
- - Opens the Report Email dialog so that you can address and compose an email that the report will be attached to. For best results, ensure your email client is running before you attempt to send a report via email.
- - Opens the Export Report dialog so that you can save the report to a file. File types include Crystal Reports (.rpt), PDF (.pdf), Microsoft Excel (.xls), Microsoft Word (.doc), rich text (.rtf), and XML (.xml).
Data extensions
The following data extension is available for the report:
- Vendors
- Invoices
- Payments
Vendor Record ID
Vendor tab
Select the vendor class to assign the vendor to. Vendor classes are used for grouping, filtering, and sorting reports.
Press F3 to look up the value.
If a value is already selected, you can press F4 to open the record in its native editor.
- Individual
- C Corporation
- S Corporation
- Partnership
- Trust/Estate
- LLC C Corporation
- LLC S Corporation
- LLC Partnership
- Other
The vendor's Employer ID Number (EIN) or Social Security Number (SSN). Include dashes in the federal ID. ActivityHD warns you if another vendor is found in the system with the same federal ID. You can override the warning if you need to enter multiple vendors with the same federal ID.
You must have "Federal ID" access to the Vendors resource to view the contents of this field unobscured. If you have access, you can choose whether to obscure the contents except when the field has focus or to always view its contents unobscured. To always view the contents unobscured, select ![]() > View > Federal ID > Show Unobscured.
> View > Federal ID > Show Unobscured.
This system-maintained field indicates the last date that the vendor was marked as included in the Report Independent Contractors process. A vendor is included in this process when the date in this field comes before the range of reporting dates defined on the Options tab of the process wizard.
If needed, you can use the mass changer to change or remove the date on multiple vendors.
If marked, indicates the site has multiple ActivityHD companies which share the same payer TIN and, thus, separate 1099s may need to be generated in order to report the vendor correctly.
By default, the checkbox is unmarked. The default behavior is to combine payments for multiple vendors which share the same tax ID.
When the checkbox is marked, the following behaviors result:
- The Generate 1099s process produces a separate 1099 for the vendor even if there are other vendors with the same tax ID.
- The minimum reporting threshold is applied on payments to the vendor and not to the combined payments for all vendors with the same tax ID.
- The vendor code appears in the "Account number" box on printed 1099s and in the "Payer Account for Payee" field in the electronic reporting file.
- If corrections are required, corrections are performed for vendor-specific 1099s, not for combined vendors with the same tax ID.
- All vendors which share the same tax ID are required to have the same Separate 1099 Form setting.
- Location. Group the vendor's invoices by payment location and produce one payment per payment location.
- Location, AP Account. Group the vendor's invoices by payment location and by AP account. Produce one payment for each different payment location/AP account combination.
- One Invoice per Payment. Produce a separate check for each invoice.
- Process Default. If you select this option, the grouping selected in Pay Invoices will be used for this vendor.
Defaults tab
Select the account number or enter an account mask for the AP liability account to assign on new invoices for the vendor. You can leave this field blank if there is no appropriate liability account for the vendor or if you always want to assign the AP account when invoices for the vendor are posted.
Press F2 to open the Account Expand dialog box where you can look up an account number, find an account number by its alias, build the account number by segment, or view setup and setup sources.
Press F3 to look up the account.
If an account is already selected, you can press F4 to open the record in the Account window.
- Check
- EFT
- Manual
Select the default payment terms to apply when an invoice is created for the vendor. Payment terms allow discount amounts and due dates to be calculated automatically on the vendor's invoices.
Press F3 to look up the value.
If a value is already selected, you can press F4 to open the record in its native editor.
Select the default distribution template to apply when an invoice is created for the vendor. A distribution template is a predefined list of accounts with instructions about how invoice amounts should be distributed among the accounts. You are prompted for a distribution template when you run the Distribution Template wizard on an invoice.
Press F3 to look up the value.
If a value is already selected, you can press F4 to open the record in its native editor.
Select the account number or enter an account mask for the default distribution account to assign on new invoices for the vendor. Distribution account masks allow a distribution template to be used on multiple vendors since the account mask can be specified by vendor. Leave this field blank if there is no appropriate distribution account mask to serve as the default or if the accounts in the distribution template do not vary by vendor.
Press F2 to open the Account Expand dialog box where you can look up an account number, find an account number by its alias, build the account number by segment, or view setup and setup sources.
Press F3 to look up the account.
If an account is already selected, you can press F4 to open the record in the Account window.
For each attribute listed, provide the default attribute item to apply when the vendor is assigned on an invoice.
Press F3 to look up the value.
If a value is already selected, you can press F4 to open the record in its native editor.
Select an APCode to include in the list.
Press F3 to look up the value.
If a value is already selected, you can press F4 to open the record in its native editor.
- Use Tax
- Payment Reporting
- Payment Withholding
PO tab
The PO tab is visible when the ActivityHD Purchasing package is installed:
Select the default shipping address to assign on purchase orders for this vendor. This default is particularly useful if purchases from the vendor are typically shipped to a single address.
Press F3 to look up the value.
If a value is already selected, you can press F4 to open the record in its native editor.
Select the default freight terms negotiated with the vendor. Freight terms identify whether the buyer or seller pays for shipping and determines where responsibility for the goods is transferred. Freight terms are typically communicated on the PO that is sent to the vendor.
Press F3 to look up the value.
If a value is already selected, you can press F4 to open the record in its native editor.
Select the default shipping method to use on purchase orders for this vendor. The shipping method designates how products are shipped from the vendor to your company's shipping address. Typically, the shipping method corresponds to a shipping company such as UPS or FedEx.
Press F3 to look up the value.
If a value is already selected, you can press F4 to open the record in its native editor.
Select the department(s) for which this vendor is an approved supplier. This field works in conjunction with the Restrict Vendors flag on departments in Purchasing. When a purchase is entered for a restricted department, only the vendors assigned to that department are eligible to be used. This helps you ensure that a department conducts business with only those vendors they are authorized to conduct business with. If a department is not restricted, purchases can be made from any valid vendor.
If you select multiple departments, separate them with commas. If you use the Find dialog box to select departments, you can use Ctrl and/or Shift selection to select multiple departments.
Press F2 to open a dialog box where you can add and remove selections for this field.
Press F3 to look up the item.
Custom tab
This tab is visible if custom fields exist for the entity. At a minimum, if there are custom fields, a Fields subtab will be present. One or more additional categories of subtabs may also be visible.
Fields subtab
This tab prompts for values for any custom fields set up for entity records of this entity type. Respond to the prompts as appropriate.
References subtab
This tab is visible if other records reference the current record.
Example
Suppose a custom field exists on PRCodes that references an ARCode. On the ARCode record, on the Custom > References subtab, you can view all the PRCodes which reference that ARCode.
Exchange Folder subtab
This tab is visible only if you set up a custom field with a data type of "Exchange Folder". The label on this tab is the name assigned to the custom field.
This tab shows the contents of the specified Exchange folder.
File subtab
This tab is visible only if you set up a custom field with a data type of "File". The label on the tab is the name assigned to the custom field.
This tab renders the contents of the specified file according to its file type.
Internet Address subtab
This tab is visible only if you set up a custom field with a data type of "Internet Address". The label on this tab is the name assigned to the custom field.
This tab shows the contents of the specified web page.
Network Folder subtab
This tab is visible only if you set up a custom field with a data type of "Network Folder". The label on this tab is the name assigned to the custom field.
This tab shows the contents of the specified network folder.
Data Links tab
See "Data Links".
Locations tab
The Locations pane shows the Locations HD view filtered to show all locations for the selected vendor.
Double-click a row in the pane to drill down to its record in the Location window.
Contacts tab
The Contacts pane shows the Contacts HD view filtered to show all contacts for the selected vendor.
Double-click a row in the pane to drill down to its record in the Contact window.
Notes tab
The Notes pane shows the Notes HD view filtered to show all notes for the selected vendor.
Double-click a row in the pane to drill down to its record in the Note window.
Invoices tab
The AP Invoices pane shows the AP Invoices HD view filtered to show all invoices for the selected vendor.
Double-click a row in the pane to drill down to its record in the AP Invoice window.
Payments tab
The Payments pane shows the Payments HD view filtered to show all payments to the selected vendor.
Double-click a row in the pane to drill down to its record in the Payment window.
1099s tab
The 1099s pane shows the 1099s HD view filtered to show all 1099 records for the selected vendor.
Double-click a row in the pane to drill down to its record in the 1099 window.
Purchases tab
The Purchases pane shows the Purchases HD view in Purchasing filtered to show all purchases from the selected vendor.
Double-click a row in the pane to drill down to its record in the Purchase window.
Orders tab
The Purchase Orders pane shows the Purchase Orders HD view in Purchasing filtered to show all orders from the selected vendor.
Double-click a row in the pane to drill down to its record in the Purchase Order window.
Attachments tab
The Attachments tab is visible if any record for a given entity has an attachment. If the Attachments tab is not visible, this implies that no record of the entity type has an attachment on it; however, once an attachment is added to any record of the entity type, the Attachments tab will become available.
Change Logs tab
This tab is visible if the user has "Change Logs" access to the associated data folder resource.
The Change Logs pane shows the Change Logs HD view filtered to show all change logs for the selected entity record.
Double-click a row in the pane to drill down to its record in the Change Log window.
Other tab
This tab shows the history of changes to the current record or to some aspect of the current record.
Administrators can manage which changes are tracked by activating or inactivating change logs in the Administration > Setup > Change Logs folder.
Developer tab
This tab is visible only when developer features are enabled.
Automation subtab
This subtab shows field names and values for the current data record. Use the information in the subtab to assist when creating automation objects such as bots and import files. The field names and field values can be copied from the text box and pasted directly into your code or application. To copy content from the text box, highlight the content to copy and press Ctrl+C or right-click your selection and select Copy from the context menu.
Export (XML) subtab
This subtab shows the XML syntax for exporting the selected data record. The syntax can be copied from the text box as an exemplar for creating your own automation objects for bots, import files, ActivWebAPI, etc. To copy content from the text box, highlight the content to copy and press Ctrl+C or right-click your selection and select Copy from the context menu.
Import (XML) subtab
This subtab allows you to select a file for import and shows the XML syntax for importing data records. Use the subtab to explore the XML syntax for importing data records. In particular, you can investigate the syntax which results when using Data.Import and ActivWebAPI data POST and DELETE routes.
Change Log (XML) subtab
This subtab is visible only when the Enable Change Logs option is marked in System Options or Company Options (depending on whether the feature applies at the system or the company level). This is the default setting when developer features are enabled.
This subtab allows you to investigate changes to the current data record. The syntax can be copied for use in bots, dashboards, ActivWebAPI, and other automation. To copy content from the text box, highlight the content to copy and press Ctrl+C or right-click your selection and select Copy from the context menu.
Select Statement (SQL) subtab
This subtab allows you to investigate the SQL select statement used to retrieve the current data record. The syntax can be copied as an exemplar for data sources and other automation. To copy content from the text box, highlight the content to copy and press Ctrl+C or right-click your selection and select Copy from the context menu.

|
|
Vendors security
Common accesses available on vendors
| Access | A user with this access can... |
|---|---|
| Change | Use the mass change action on vendors. |
| Change Logs | |
| Custom Fields | Create and edit custom fields for vendors. |
| Data | Have read-only access to vendors from anywhere in the software (e.g., field validations, filters, date expressions). |
| Delete | Delete vendors. |
| Edit | Edit vendor records. |
| Export | Export vendor records from ActivityHD. |
| Import | Import vendor records into ActivityHD. |
| New | Create new vendor records. |
| Read | Have read-only access to vendor records. |
| Report | Run reports with vendor information. |
| Report Designs | Create and edit report designs with vendor information. This access enables the Report Designs button on the Output tab of report dialogs. |
| Shared Answers | Create and edit saved answers related to vendors. |
| Shared Filters | Create and edit shared filters on vendors. |
| Visible | View the Vendors folder in the Navigation pane. |
Special accesses available on vendors
| Access | A user with this access can... |
|---|---|
| Combine | Combine vendor records. |
| Federal ID | View federal IDs unobscured. |
Vendor filters
The following built-in filters are available for vendors:
Aged Invoice Analysis security
Common accesses available on the Aged Invoice Analysis
| Access | A user with this access can... |
|---|---|
| Report Designs | Create and edit report designs for the Aged Invoice Analysis report. This access enables the Report Designs button on the Output tab of the report dialog. |
| Run Report | Run the Aged Invoice Analysis report. |
Cash Requirements Report security
Common accesses available on the Cash Requirements Report
| Access | A user with this access can... |
|---|---|
| Report Designs | Create and edit report designs for the Cash Requirements Report. This access enables the Report Designs button on the Output tab of the report dialog. |
| Run Report | Run the Cash Requirements Report. |
Invoice Payment Analysis security
Common accesses available on the Invoice Payment Analysis
| Access | A user with this access can... |
|---|---|
| Report Designs | Create and edit report designs for the Invoice Payment Analysis report. This access enables the Report Designs button on the Output tab of the report dialog. |
| Run Report | Run the Invoice Payment Analysis report. |
Vendor Invoices Report security
Common accesses available on the Vendor Invoices Report
| Access | A user with this access can... |
|---|---|
| Report Designs | Create and edit report designs for the Vendor Invoices Report. This access enables the Report Designs button on the Output tab of the report dialog. |
| Run Report | Run the Vendor Invoices Report. |
Vendor Payments Report security
Common accesses available on the Vendor Payments Report
| Access | A user with this access can... |
|---|---|
| Report Designs | Create and edit report designs for the Vendor Payments Report. This access enables the Report Designs button on the Output tab of the report dialog. |
| Run Report | Run the Vendor Payments Report. |
1099 Detail Report security
Common accesses available on the 1099 Detail Report
| Access | A user with this access can... |
|---|---|
| Report Designs | Create and edit report designs for the 1099 Detail Report. This access enables the Report Designs button on the Output tab of the report dialog. |
| Run Report | Run the 1099 Detail Report. |
Report Email dialog
- Windows user default account. Sends email using the user's Windows default email account. For most users, this is the account configured in Outlook or another email client application.
- Server personal. Sends email using the email configuration for the system or company server and the email address on the current user's authorized user record. The authorized user record must have a confirmed email address.
- Server generic. Sends email using the email configuration and "from" address for the system or company server. This option requires "Send generic" access to the Server Email resource.
|
5225 S Loop 289, #207 Lubbock, TX 79424 806.687.8500 | 800.354.7152 |
© 2025 AccountingWare, LLC All rights reserved. |